


As mentioned in my first post in this series, I'm a fan of the current Build in Public movement that I see all over tech Twitter. Thus:
In an effort to not only reinforce my own learning, but also to help any others just getting started in coding and learning basic HTML and CSS, I decided to build a simple landing page... in public.
Nothing fancy (at least for this first build). No loops or functions or frameworks or databases or... Just basic HTML and CSS.
Then, I decided to not only simply create a landing page, but rather to include some basic info for those new to this. This is by no means a complete tutorial, but definitely includes some useful info that you can put into practice...
So here we are: I uploaded a basic HTML file with nothing but some basic filler text, or rather, a few sentences about what I'm doing and some links on how to follow my progress.
The site can be found at the following URL: https://aldercode.com/buildinpublic1/
The before photo...
Here's how it looks:
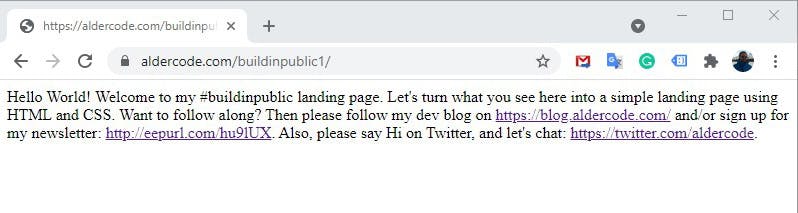
Some of the very first things that are noticeable, other than the complete lack of styling, include:
- The top of the tab contains unhelpful text: namely just the URL (before it gets cropped off);
- the 'favicon', i.e. the little icon at the top of the tab, is currently set to its default. In this case, it shows a globe/Earth. Not too serious, but it's always handy for when someone has multiple tabs open and wants to see at a glance what's where;
- There are no line breaks - it's just a run-on paragraph. I may have written the text in paragraphs (as you'll see in the upcoming source code), but the browser is currently ignoring that;
- There is no noticeable alignment. Everything just starts at the top left and runs to the right-hand edge.
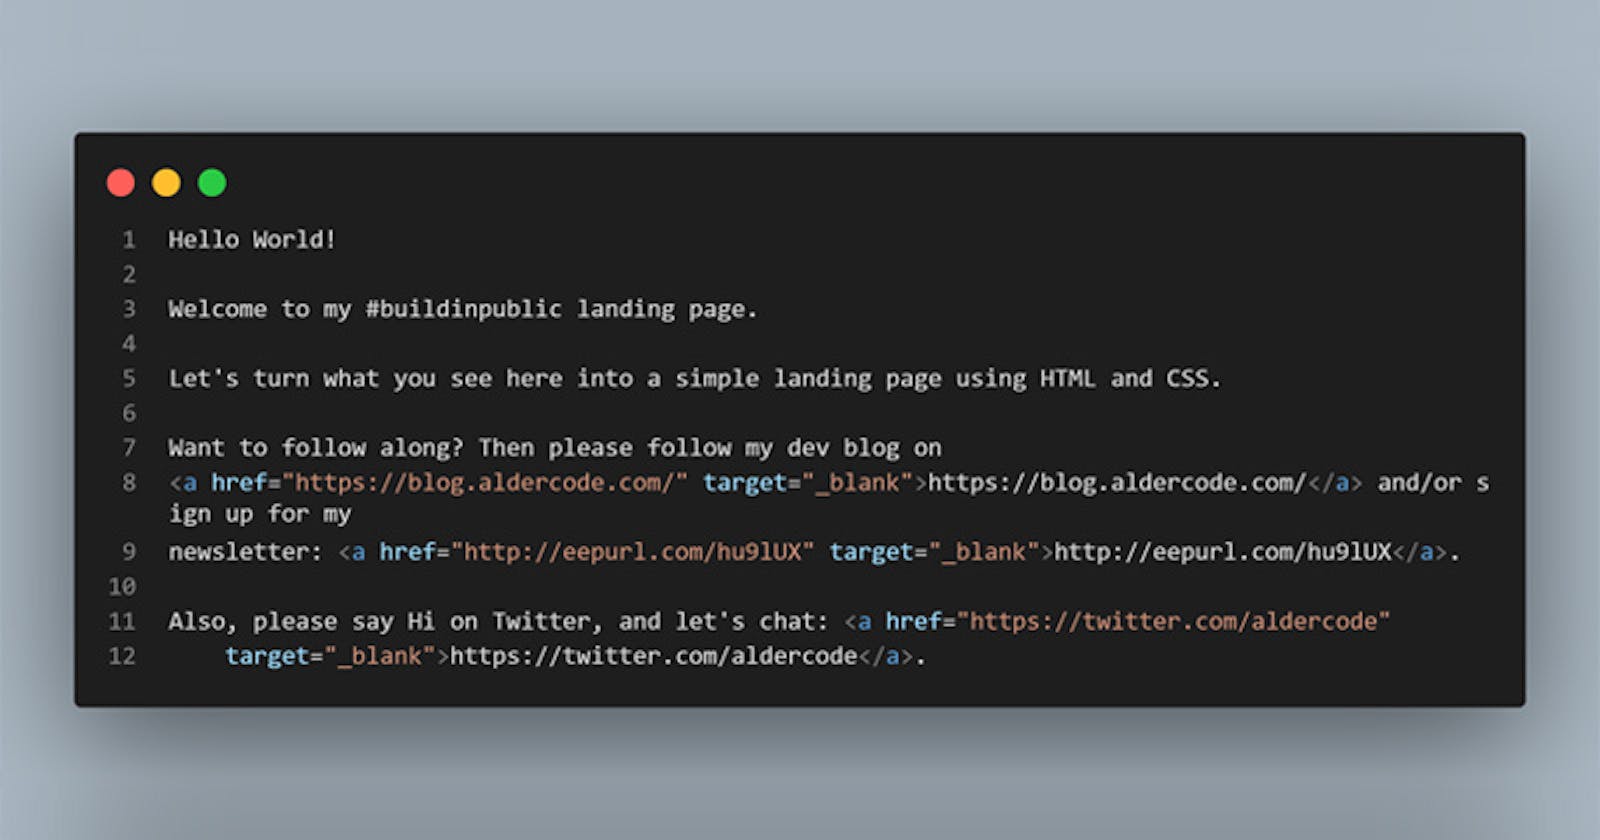
What you do not see as an end-user is that there is zero HTML structure to this. Here's the page source code at this point:
Hello World!

Welcome to my #buildinpublic landing page.

Let's turn what you see here into a simple landing page using HTML and CSS.

Want to follow along? Then please follow my dev blog on <a href="https://blog.aldercode.com/" target="_blank">https://blog.aldercode.com/</a> and/or sign up for my newsletter: <a href="http://eepurl.com/hu9lUX" target="_blank">http://eepurl.com/hu9lUX</a>.

Also, please say Hi on Twitter, and let's chat: <a href="https://twitter.com/aldercode" target="_blank">https://twitter.com/aldercode</a>.
Note the complete lack of any form of structure or tags whatsoever (other than the 'a href' tags I had to add for the links that I included).
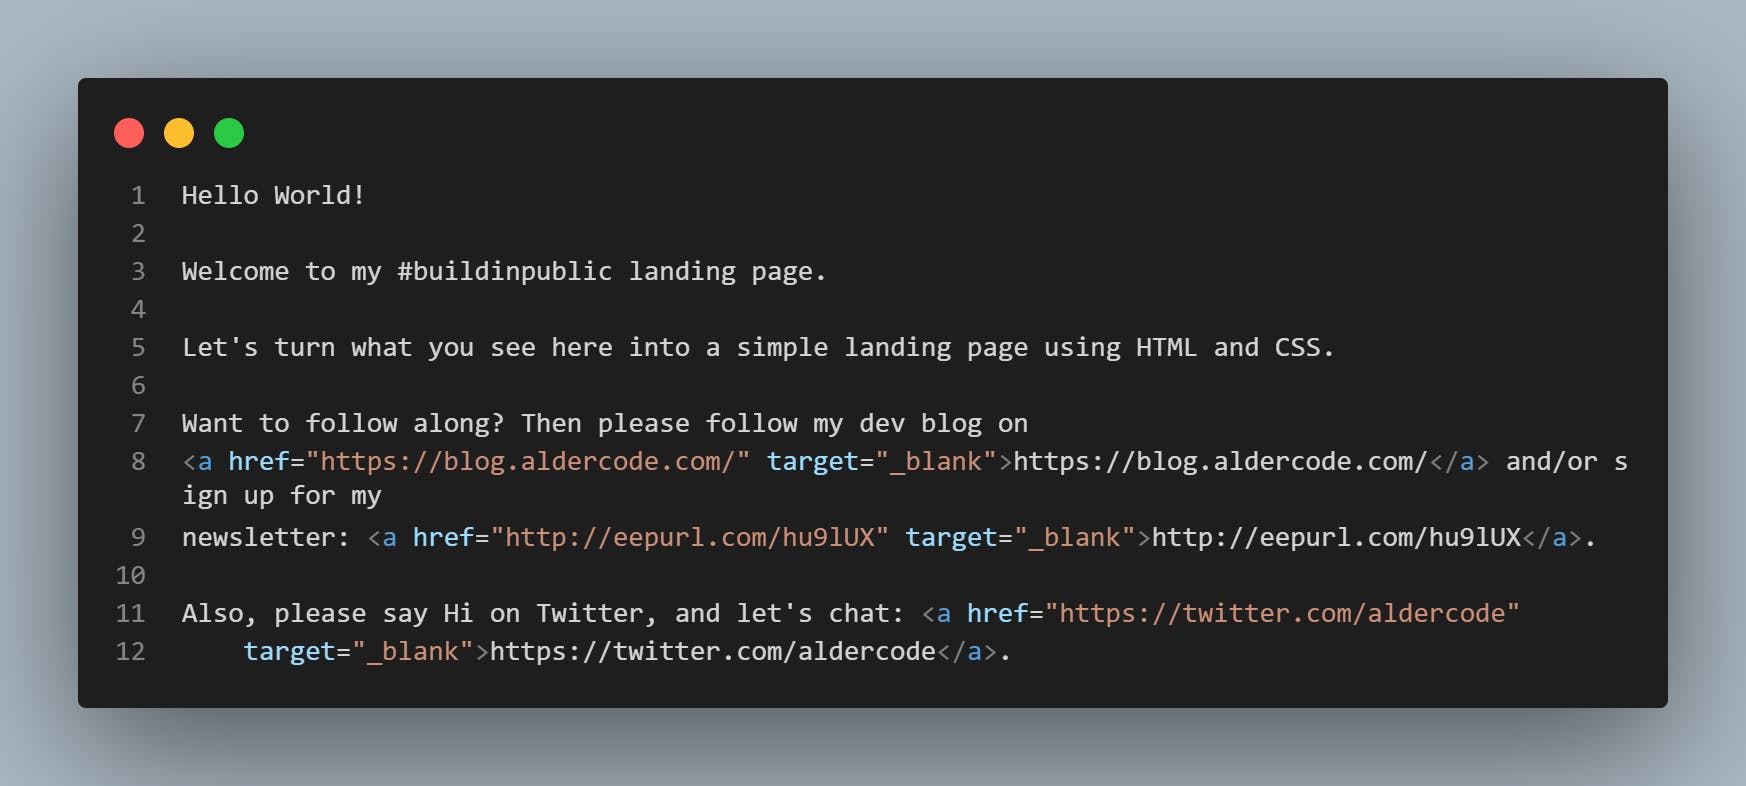
It's even easier to see how anything useful is missing in this code snippet picture:
So, let's get started fixing this, shall we?
HTML elements and tags
The very first item to not only remedy here, but to do when creating any HTML file, is to add the basic structure.
HTML structure elements utilise an opening and closing tag with relevant text or info between. So, for example, a paragraph tag, which utilises the letter 'p' looks as follows:
<p>This is a paragraph</p>
The same applies to nearly all other tags (with a few exceptions which will be covered in a later post).
Adding basic HTML structure
Now that we've glanced over tag basics, the full basic HTML structure is as follows:
<!DOCTYPE html>

<html>

<head>
</head>

<body>
</body>

</html>
The first item '!DOCTYPE html' is the declaration that declares the type of document. This helps browsers to correctly display the page/pages.
The second is the opening 'html' tag. Everything the site needs and displays comes between the opening 'html' tag and the closing one, shown here at the very end.
Third, the 'head' tag. This is not strictly required per se for HTML5, but as you'll see later, is definitely something that you want to be using as it contains all the important About info, links to external stylesheets and files and so on. We're thus most definitely including it here.
Then, we get the 'body' tag. This is where all the content that the website visitor will see goes.
And that's it for the real basics as an absolute minimum.
Therefore, let's go ahead and add this structure to the landing page.
Updated page with HTML structure
All done? Good. Here's how it now looks:

The page is definitely looking better, even if it won't be winning any design awards quite yet. Styling will be applied later...
The updated source code is as follows:
<!DOCTYPE html>
<html lang="en">

<head>
    <meta charset="UTF-8">
    <title>Document</title>
</head>

<body>
    <h1>Hello World!</h1>

    <p>Welcome to my #buildinpublic landing page.</p>

    <p>Let's turn what you see here into a simple landing page using HTML and CSS.</p>

    <p>Want to follow along? Then please follow my dev blog on
    <a href="https://blog.aldercode.com/" target="_blank">https://blog.aldercode.com/</a> and/or sign up for my
    newsletter: <a href="http://eepurl.com/hu9lUX" target="_blank">http://eepurl.com/hu9lUX</a>.</p>

    <p>Also, please say Hi on Twitter, and let's chat: <a href="https://twitter.com/aldercode"
    target="_blank">https://twitter.com/aldercode</a>.</p>
</body>

</html>
Some items to pay attention to:
Notice how I added two items within the 'head' tag?
<meta charset="UTF-8">
<title>Document</title>
- The first tag explains the text encoding to the browser. To "borrow" from W3 Schools' excellent website:
The charset attribute specifies the character encoding for the HTML document. The HTML5 specification encourages web developers to use the UTF-8 character set, which covers almost all of the characters and symbols in the world!
- Personally, I wouldn't lose any sleep over the specific item quite yet. Simply add it in and carry on with your day.
- The second is the page title. Remember in the first version how the top of the tab simply showed the page's URL? Now it shows the word 'Document', the page's title. We'll come up with something a little better in the next post.
- Note how the words 'Hello World!' have an 'h1' tag instead of a 'p' tag? The 'h' means 'Heading', and runs from 1 (biggest) to 6 (smallest). They're used for exactly what you think they are: headings and sub-headings.
- Also, you'll notice that I went ahead and added the aforementioned 'p' tags to each separate paragraph. Now, instead of a single run-on paragraph, the text is neatly split into paragraphs.
- Did you notice the little something extra included as part of the opening 'html' tag? I added 'lang="en"'. Again, this does exactly what it claims on the box: declares the language of the website (English), to assist both browsers and search engines.
- There are also still some 'a href' tags for the links, which we'll get to in due course.
By adding this basic HTML skeleton we've now gone from a single run-on paragraph to a basic webpage with the correct technical structure.
And on that note, that brings us to the end of Part 1.
Part 2, available now...
Spotted any errors or omissions? Please do let me know!
Liked the post? Then please stop by on Twitter to say Hi.